Online appointments
Enabling the calendar
Setting up online appointment booking, from start to finish.
In this article
Online appointment booking lets your patients request a slot themselves, without calling you. You keep the final say: every request waits for your confirmation.
The five steps, in order
There are five things to do. Taken one at a time, each takes two minutes. Follow this order:
Enable the calendar.
Define your appointment types.
Define your weekly availability.
Add the Appointments block to a page of your site.
Check that it all works.
Step 1 — Enable
In the left menu, click Calendar, then Calendar settings.
At the top of the page, « Enable calendar » section, flip the switch: it turns green.
A reminder appears: Add a « Calendar » section to a page of your website to show the booking form. We will do that in step 4.
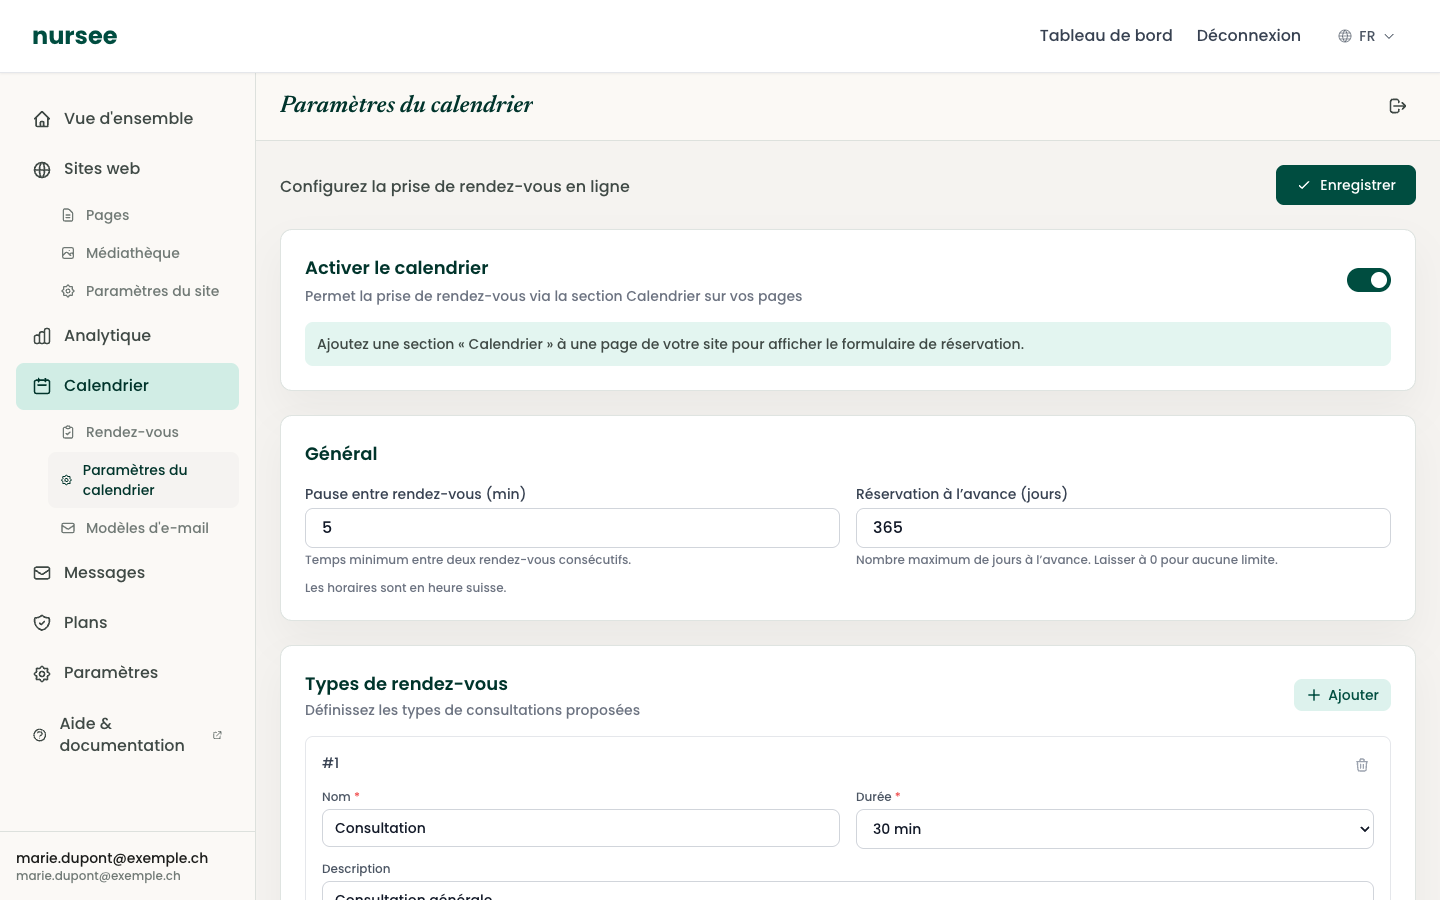
The general settings
Just under the switch, two fields control the booking mechanics.
Break between appointments (min)
The minimum time between two consecutive appointments. It will never be offered for booking.
It is your breathing space: time to tidy up, write notes, travel, drink a glass of water.
0— appointments run back to back. Not recommended.5to15— for a consultation at the practice.30to60— if you travel between patients' homes.
Booking window (days)
The maximum number of days in advance a patient can book.
0— no limit.30— one month. Comfortable for most practices.90— one quarter.
Step 2 — Your appointment types
Stay on the same page, « Appointment types » section. See Appointment types.
Step 3 — Your availability
Still on the same page, « Weekly availability » section. See Your working hours.
Do not forget to click « Save », at the top right, before you leave this page.
Step 4 — Show the form on your site
A configured calendar does not appear anywhere on its own. You have to put the block on a page:
Go to Websites → Pages.
Open the page where you want the form — most often Contact.
In the left-hand column, click « Appointments ».
Click « Save », then « Publish » if needed.
Step 5 — Test it yourself
This is the step everyone skips, and it is the most useful.
Open your public site (« Visit » button).
Go to the page carrying the form.
Book an appointment, for real, with your own e-mail address.
Check that you receive the acknowledgement e-mail.
Go back to Calendar → Bookings: your test request must be there.
Cancel it to free the slot.
In five minutes you know everything works. Without that test, you do not know.
Disabling the calendar
Flip the « Enable calendar » switch and save. The form disappears from your site. Your appointment types, your hours and your booking history are kept — you can turn it back on at any time.