Online appointments
Handling booking requests
Confirming, cancelling and following up the appointments your patients request.
In this article
When a patient books on your website, their request arrives here. It is waiting for your answer: nothing is confirmed automatically.
To get there: Calendar → Bookings.
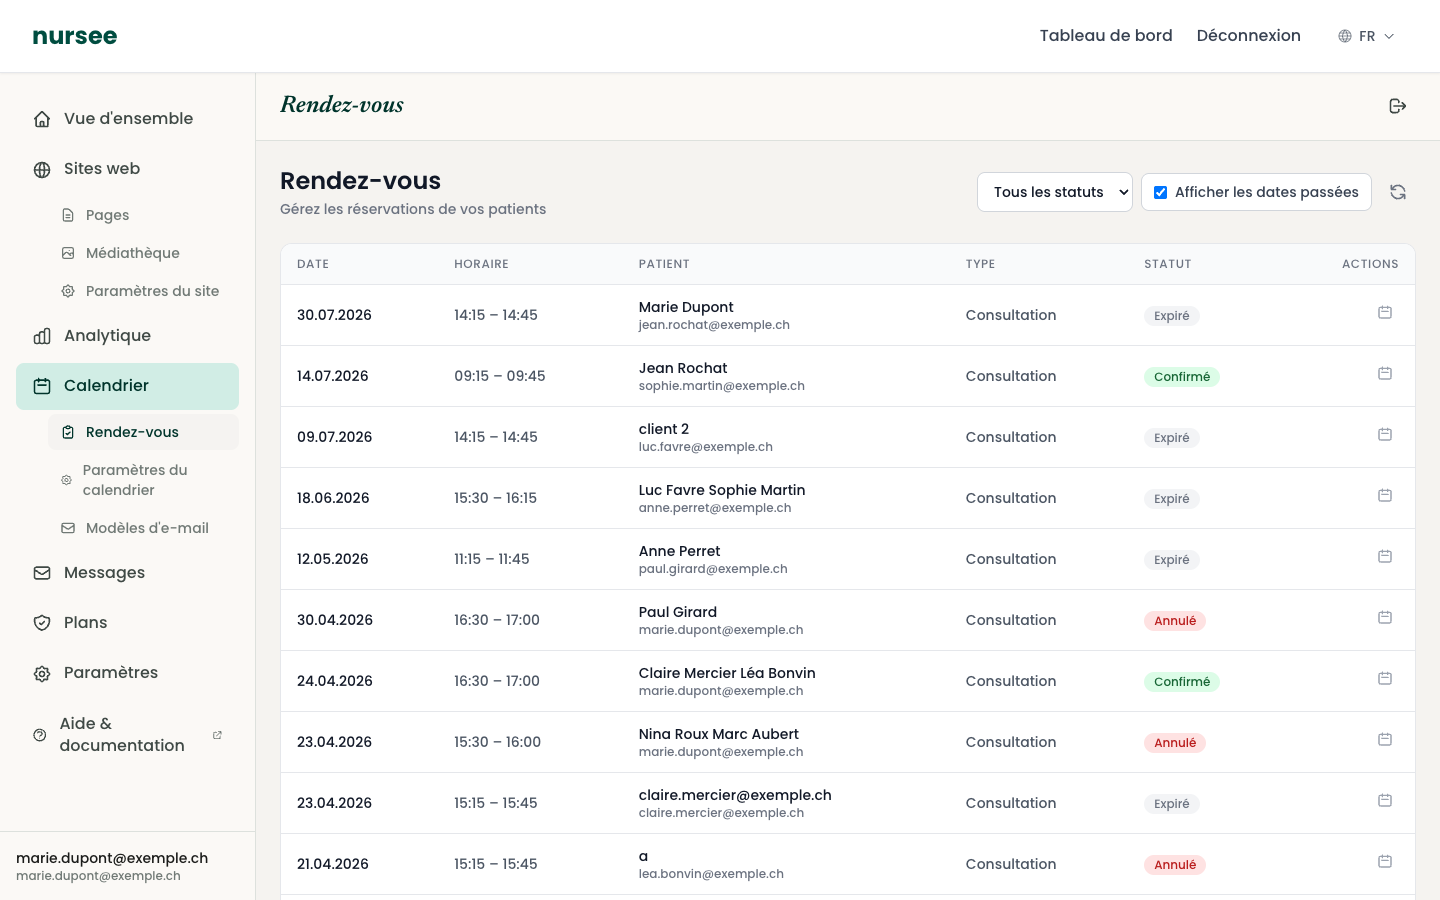
Reading the list
| Column | Contents |
|---|---|
| Date | The date of the appointment. |
| Time | The start and end time. |
| Patient | Their name and e-mail address. |
| Type | The appointment type they chose. |
| Status | Where this appointment stands (see below). |
| Actions | Confirm, cancel, add to your calendar. |
The four statuses
| Status | Meaning |
|---|---|
| Pending | The patient has asked, you need to answer. |
| Confirmed | You accepted. The patient has their confirmation. |
| Cancelled | The appointment will not happen. The patient has been told. |
| Expired | The date passed without you confirming or cancelling. |
You can tell there are pending requests from the orange dot next to Calendar in the left menu. The number tells you how many.
Confirming an appointment
On the appointment's row, click « Confirm ».
A window opens. It shows you the recipient's e-mail address and a preview of the message that will go out.
Read it over.
Click « Confirm and send ».
What then happens:
- the patient receives a confirmation e-mail;
- a calendar invitation (.ics file) is attached automatically: the patient clicks it and the appointment lands in their diary;
- the status changes to Confirmed.
Cancelling an appointment
On the appointment's row, click « Cancel ».
A window shows the recipient and a preview of the cancellation message.
Click « Cancel and send ».
The patient receives a cancellation e-mail, and the slot becomes available to others again.
Seeing the details of a request
Click anywhere on the row: a card opens with all the information.
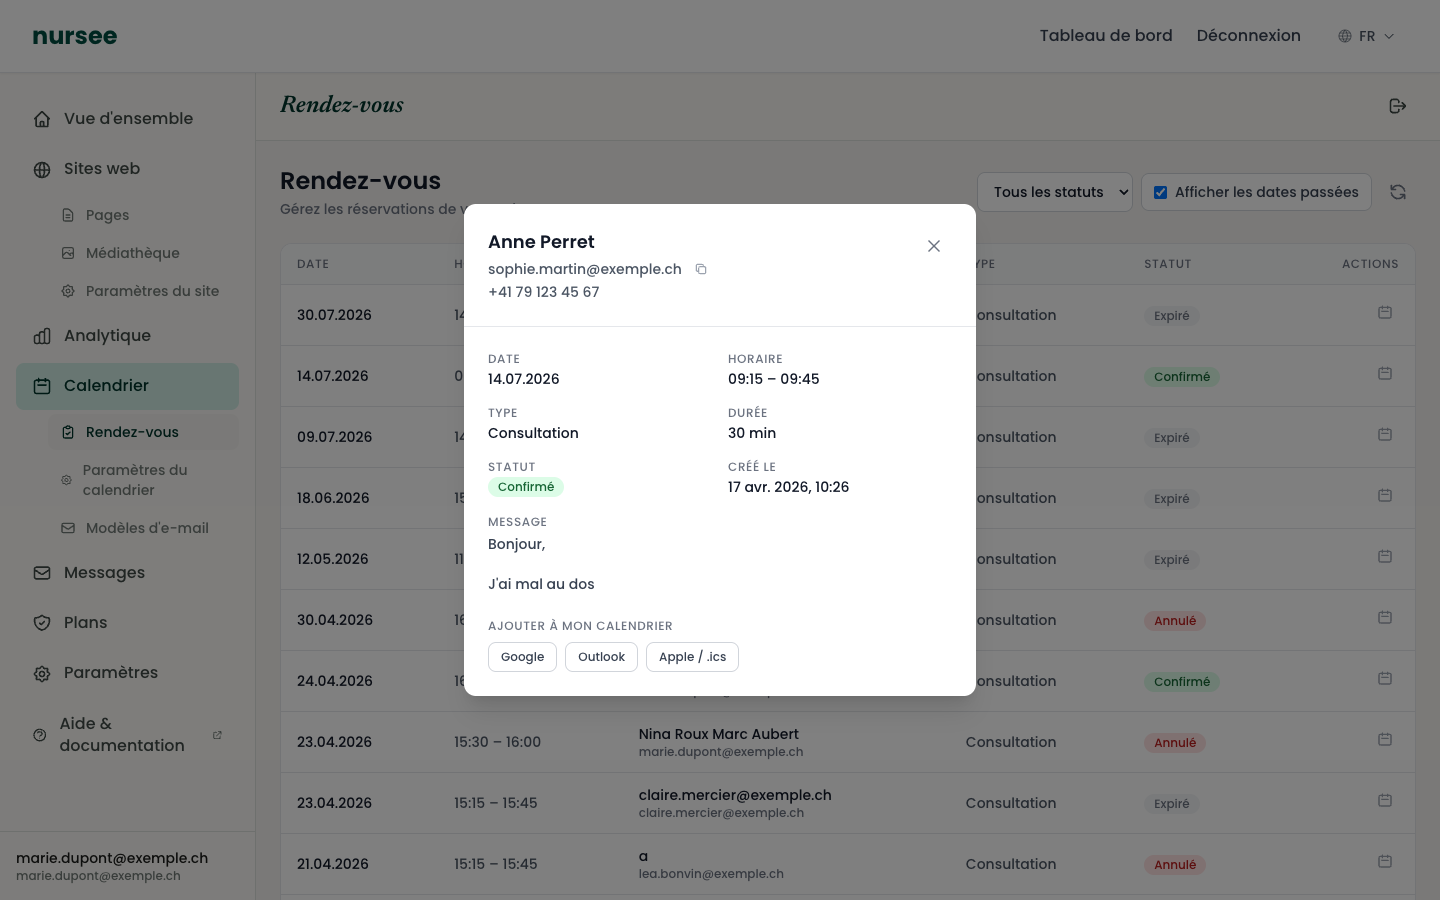
You will find:
- the name, the e-mail (with a « Copy » button) and the phone number of the patient;
- the date, time, type and duration;
- the message the patient wrote — always read it, it often contains something essential: an address, an allergy, a particular need;
- the date the request was created;
- the « Confirm » and « Cancel » buttons;
- the buttons to add the appointment to your own diary.
Adding an appointment to your own diary
Three buttons sit under « Add to my calendar »:
- Google — opens Google Calendar with the event pre-filled.
- Outlook — the same for Outlook.
- Apple / .ics — downloads a file you then open to add the appointment to your iPhone, Mac or any other calendar program.
The event contains the appointment type, the patient's name, their contact details and their message.
Seeing the history
By default the list shows only upcoming appointments. That is deliberate, so you see what matters straight away.
- Tick « Show past dates » to see the whole history.
- Use the « All statuses » drop-down to see, for instance, only the Pending ones.
- The button with two circular arrows reloads the list.
The « Expired » status
An appointment becomes Expired when its date has passed without you confirming or cancelling it.
No action is required and no e-mail is sent to the patient. The request has simply lapsed.